Steps To Create Virtual Machines
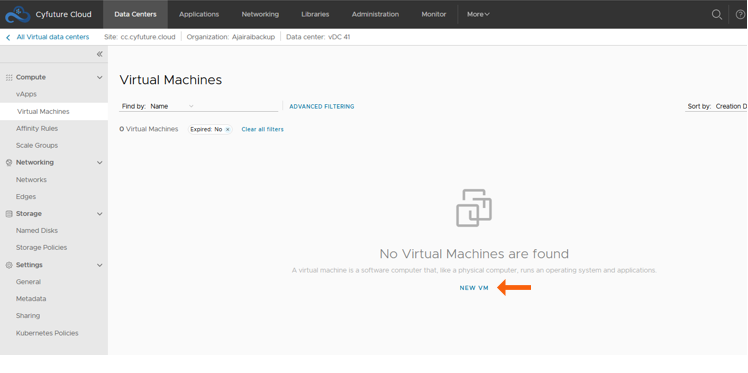
1.Once you are on Cloud Console,click on Virtual Machines as indicated
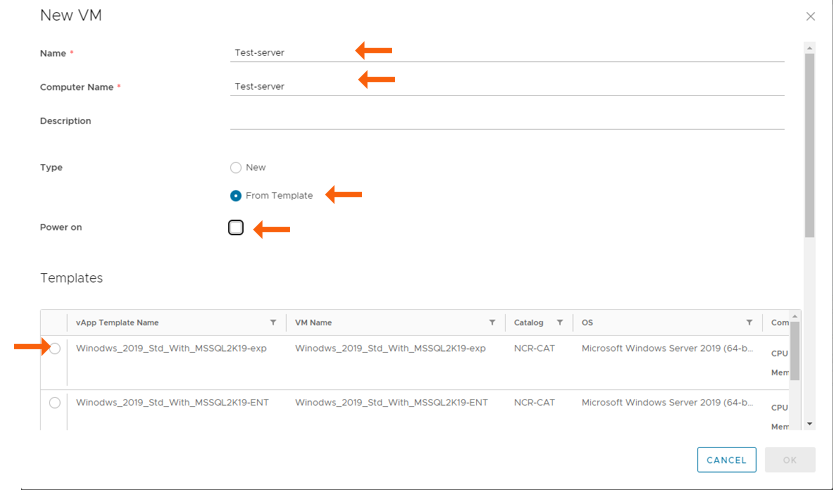
2. Fill all the details for creation of new virtual machine and choose the template of your choice and uncheck power on option.
3. You can choose the default storage policy as indicated and select machines to be created
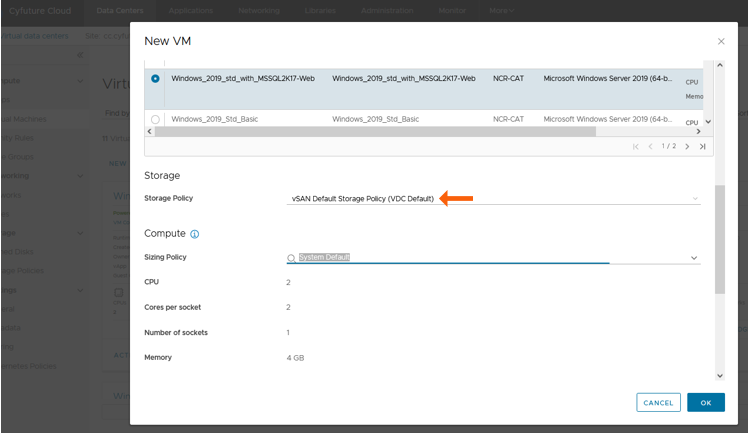
4. You can now create VM of your choice and select the size as required
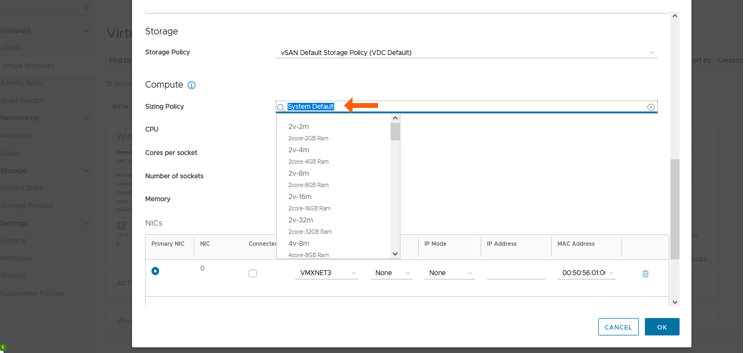
5. Once the machine sizing is selected you can now choose the size of Network adapter as indicated below
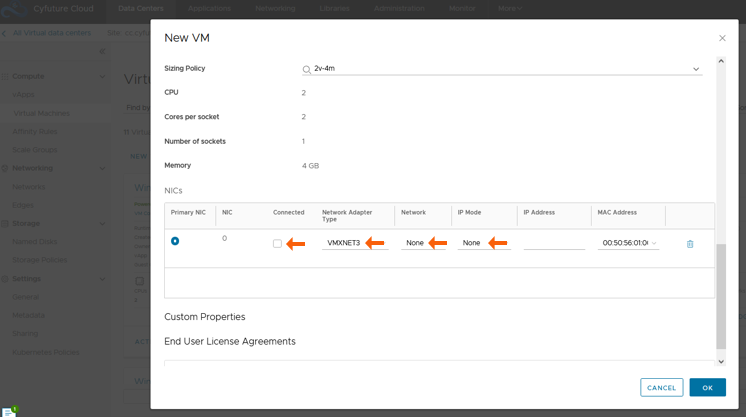
You need to click on checkbox below the connected box, and network adapter type is VMXNET3, Network type is Internal/Private Network
and IP Mode is Static IP Pool for network connection.
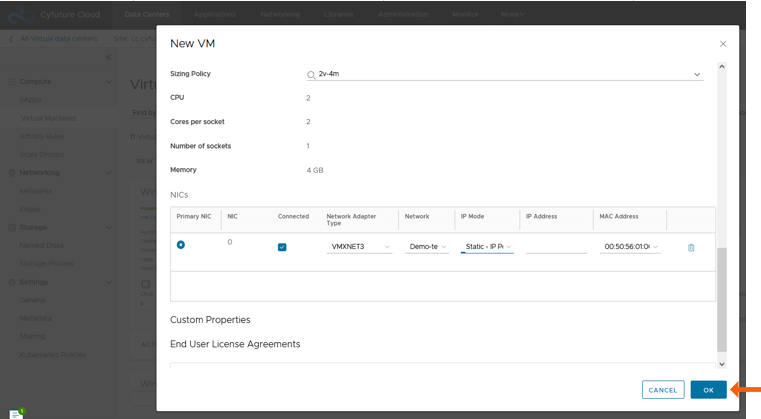
After these steps when VM is created
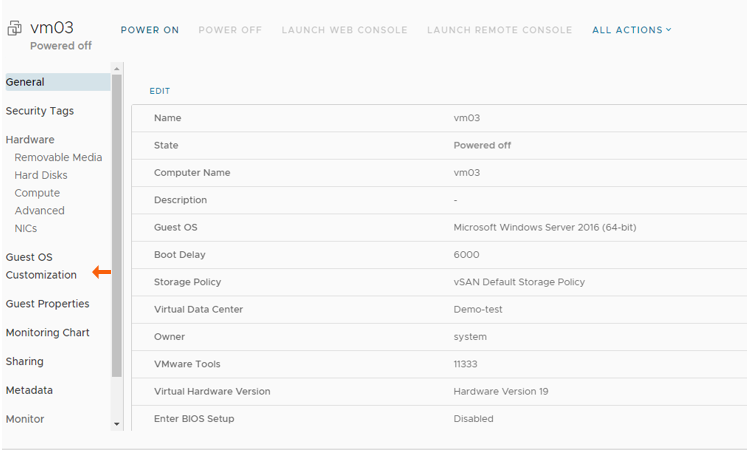
6. After creating the Virtual Machines, click on Virtual Machine.

7. Click on Guest OS customization.
8. After clicking click on edit as shown below.
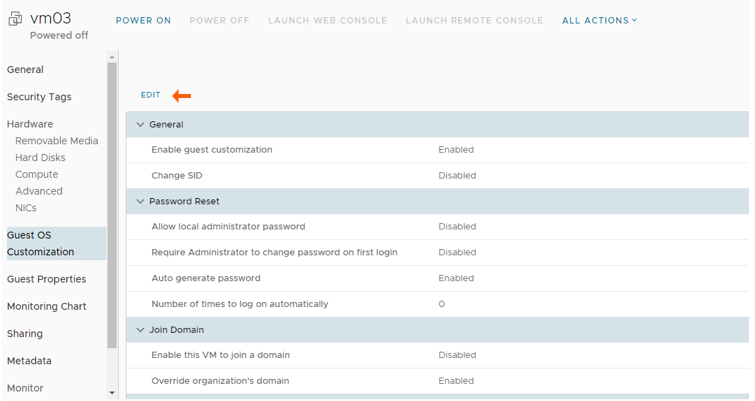
9.After clicking on edit below screen will open,click on the checkbox given before Enable guest customization ,allow local administrator password & auto generate password as shown in the image and click on save button.

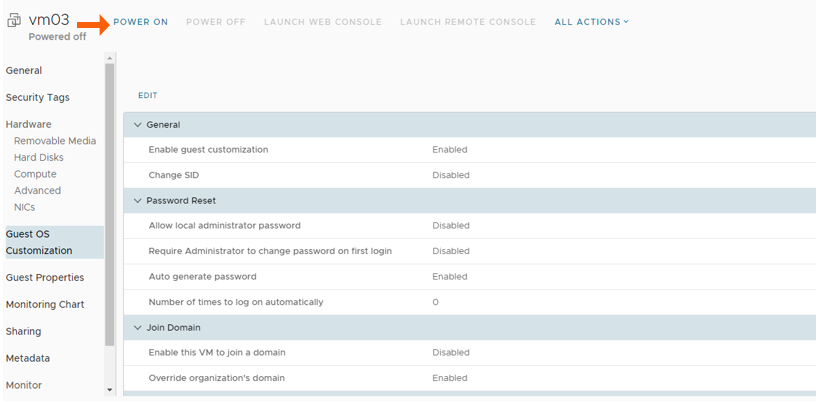
10.Click on power on button as shown in the image.
11.After VM powers on again click on guest OS customization and click on edit as shown in the image below.
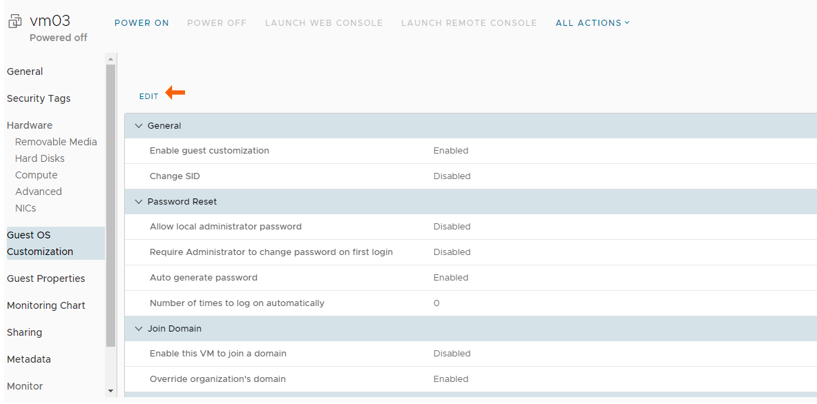
12.Below screen will open in which the user can see the generated password.
Note-(Username for windows-administrator & for linux-root)

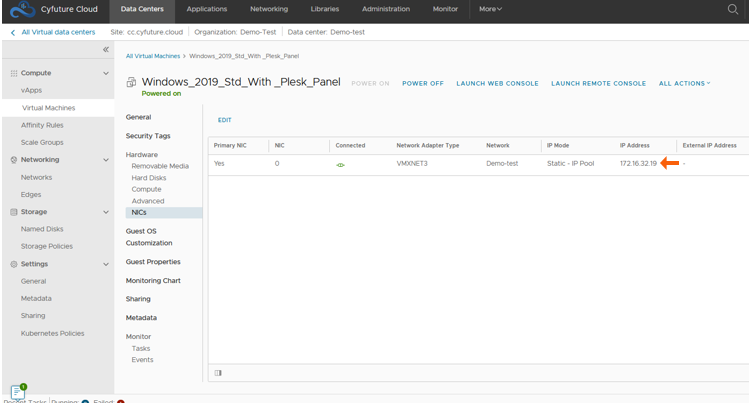
13. Under Virtual Machines menu, click on NICs.
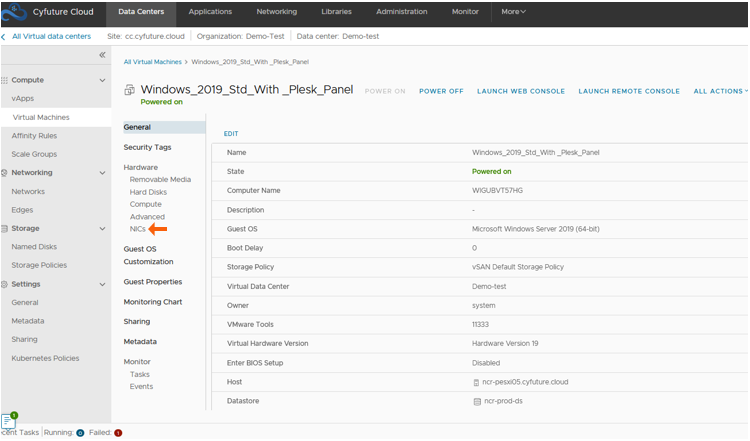
14. Once clicking on NICs, you will find the Internal/Private IP Address reflecting on the table.Kindly note it down for your reference.
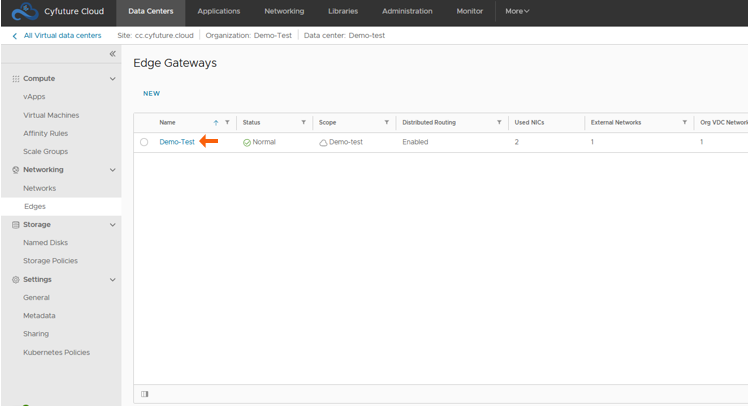
15. After noting down the IP Address, go back to the previous menu and select “Edges.” You will find a table named Edge Gateways. Click on the Field indicated below by arrow.
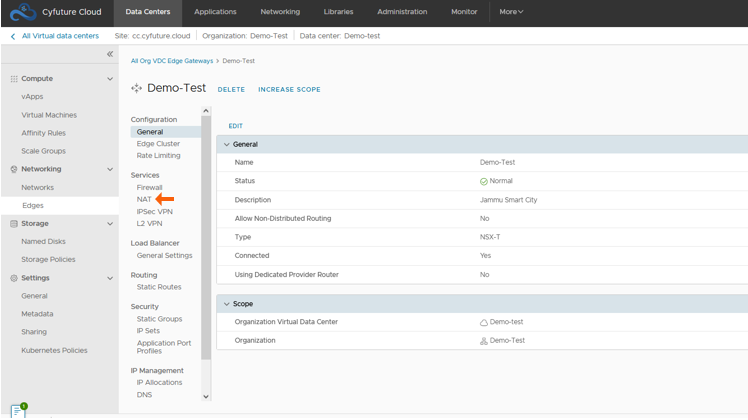
16. After the aforesaid instructions, you will find a drop down menu. Please select NAT.
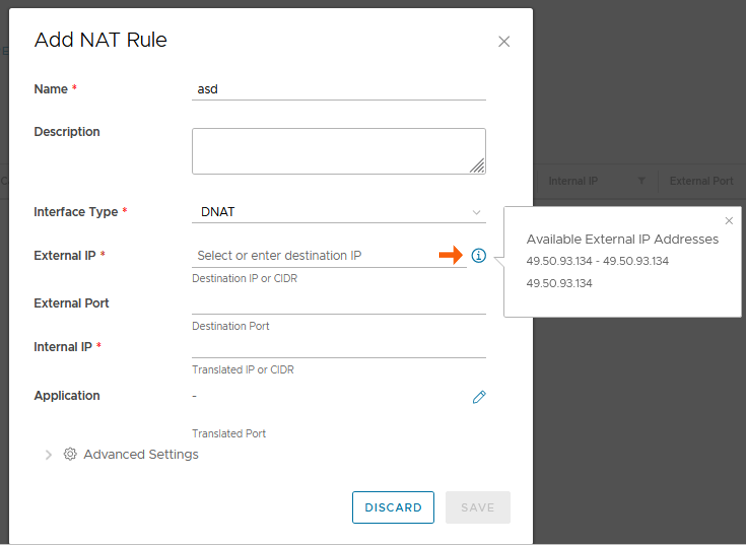
17. After clicking on NAT, you will find a NEW table. Click on NEW, then create SNAT and DNAT policy. You can create policies through the pop up box.
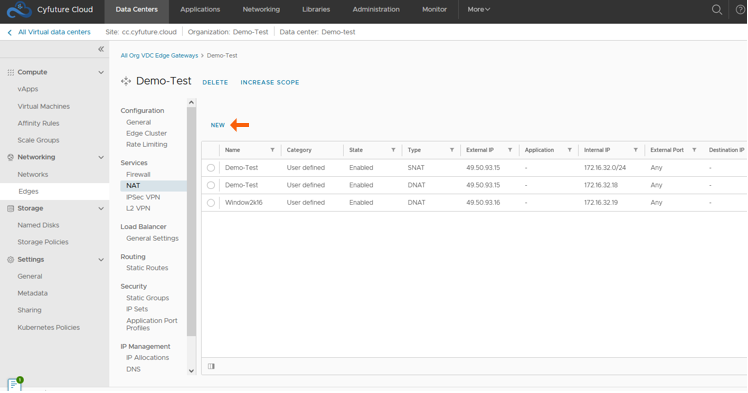
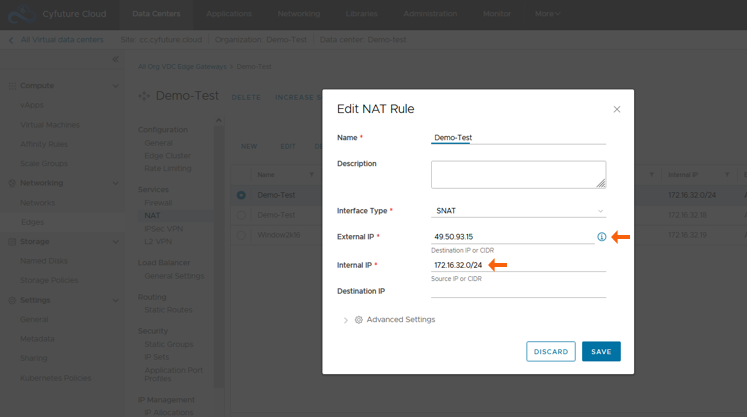
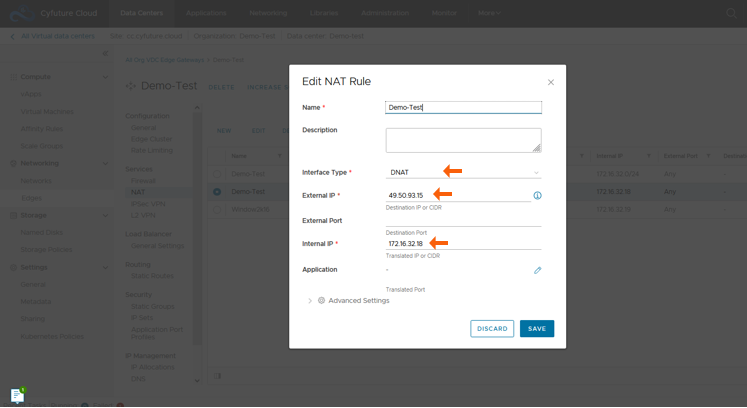
18. Click on Information symbol.It will show user's external/public available IP Address which has been assigned to the user.Kindly fill the external/public IP shown on information symbol and fill the internal/private IP which you have noted down before as mentioned in point 14.
Create SNAT by filling the following details and save.
Create DNAT by filling the following details and save.
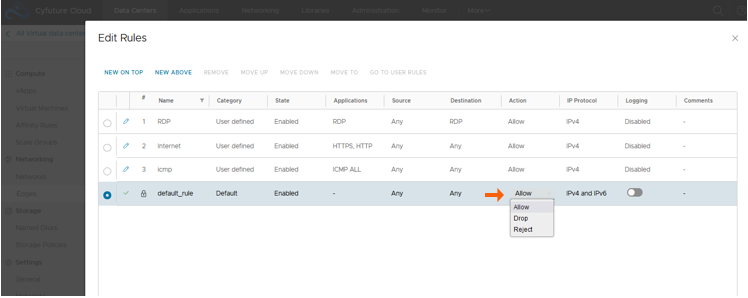
19. After SNAT and DNAT policy,click on Firewall and select the default_rule and click on edit rules.
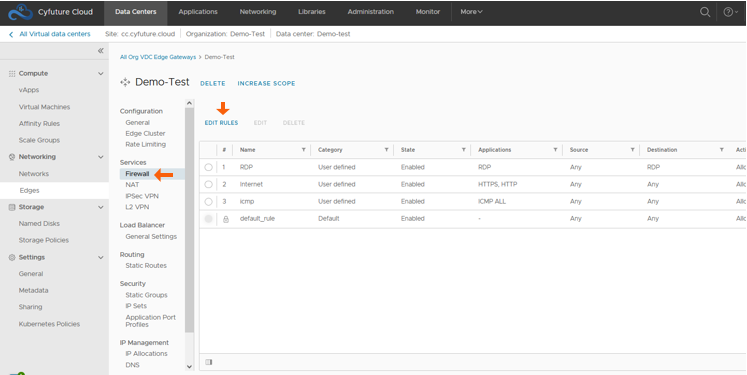
20. Change the default value showing on action Drop and select the Allow as indicated below..